


Hey there, fellow motorcycle enthusiasts! If you're into motorcycles, you know how crucial it is to keep your ride in top - notch condition. One of the components that might need replacement over time is the motorcycle clutch master cylinder. As a motorcycle clutch master cylinder supplier, I've seen it all, and I'm here to walk you through the steps to replace this vital part.
Step 1: Gather Your Tools
First things first, you'll need to gather the right tools for the job. You don't want to be in the middle of the process and realize you're missing something. You'll need a set of wrenches, both metric and standard depending on your bike. A socket set is also super handy. You'll also need a drain pan to catch the old brake fluid, some rags to clean up spills, and a new clutch master cylinder. By the way, if you're looking for a quality replacement, we've got some great options like the Universal Front Brake Master Cylinder for Motorcycle ZX - 1041.
Step 2: Prepare Your Bike
Before you start tinkering, make sure your bike is in a safe and stable position. You can use a motorcycle stand to keep it upright. It's also a good idea to disconnect the battery. This will prevent any electrical issues while you're working on the clutch master cylinder. Safety first, right?
Step 3: Drain the Brake Fluid
The clutch master cylinder is filled with brake fluid, and you need to drain it before you remove the cylinder. Locate the reservoir on the clutch master cylinder. It's usually a small plastic container on top. Use a syringe or a turkey baster to suck out as much of the brake fluid as you can and put it in the drain pan. Be careful, brake fluid is corrosive, so don't let it spill on your bike's paint.
Step 4: Remove the Clutch Line
Next, you'll need to remove the clutch line from the master cylinder. There's usually a banjo bolt that holds the line in place. Use a wrench to loosen and remove the banjo bolt. Once the bolt is out, carefully pull the clutch line away from the master cylinder. You might get a little bit of remaining brake fluid dripping out, so have your drain pan ready.
Step 5: Remove the Master Cylinder Mounting Bolts
Now, it's time to remove the master cylinder from its mounting bracket. There are usually one or two bolts that hold it in place. Use your socket set or wrenches to loosen and remove these bolts. Once the bolts are out, you can gently lift the master cylinder out of its bracket.

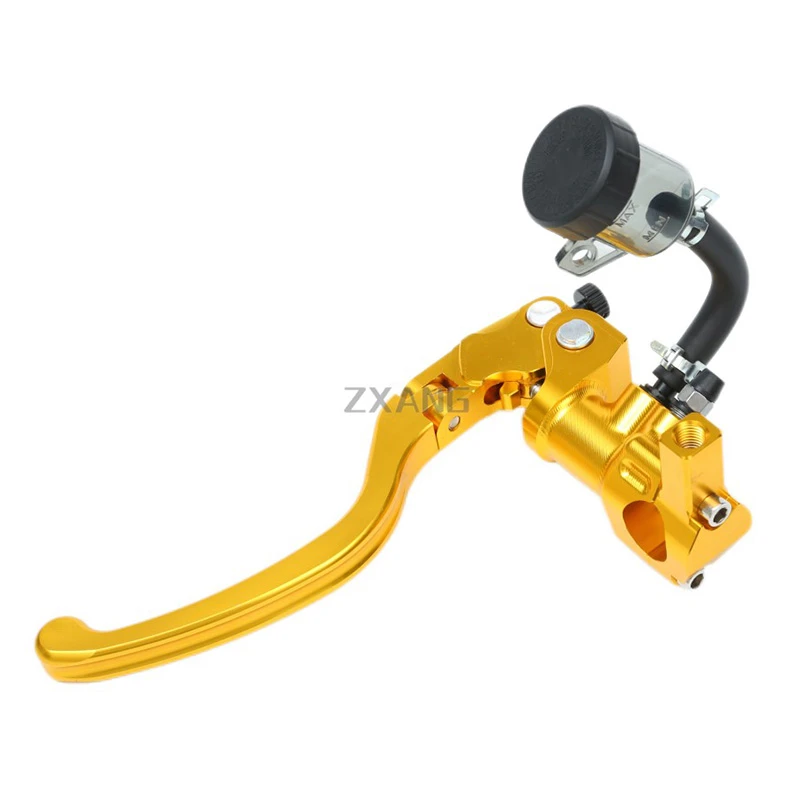
Step 6: Install the New Clutch Master Cylinder
Take your new clutch master cylinder and place it in the mounting bracket. Line up the holes for the mounting bolts and insert the bolts. Tighten them down, but don't over - tighten. You don't want to strip the threads. Then, re - attach the clutch line to the new master cylinder. Put the banjo bolt back in and tighten it securely.
Step 7: Fill the Reservoir with Brake Fluid
Open the reservoir on the new clutch master cylinder and fill it with fresh brake fluid. Make sure you use the type of brake fluid recommended by your motorcycle's manufacturer. You can find this information in your owner's manual. Fill the reservoir to the appropriate level, usually marked on the side of the reservoir.
Step 8: Bleed the Clutch System
Bleeding the clutch system is super important. It removes any air bubbles from the system, which can cause a spongy clutch feel. You'll need a friend to help you with this. One person will need to sit on the bike and operate the clutch lever, while the other person will open and close the bleeder valve on the clutch slave cylinder.
Start by opening the bleeder valve a little bit. Have your friend pull the clutch lever all the way in and hold it. Then, close the bleeder valve. Have your friend release the clutch lever slowly. Repeat this process several times until you see a steady stream of brake fluid coming out of the bleeder valve without any air bubbles. If you're interested in another great master cylinder option, check out our Motorbike Front Brake Master Cylinder ZX - 1021.
Step 9: Check for Leaks
Once you've bled the clutch system, check for any leaks around the master cylinder, the clutch line, and the bleeder valve. Look for any signs of brake fluid dripping or pooling. If you find a leak, tighten the connections or replace any damaged parts.
Step 10: Test the Clutch
Finally, it's time to test the clutch. Sit on the bike and operate the clutch lever a few times. The clutch should feel firm and engage smoothly. If it still feels spongy, you might need to bleed the system again.
And there you have it! Those are the steps to replace a motorcycle clutch master cylinder. It might seem like a daunting task at first, but with the right tools and a little patience, you can do it yourself.
If you're in the market for a high - quality motorcycle clutch master cylinder, we've got a wide range of products to choose from. Our Motorcycle Master Cylinder ZX - 1063 is another great option that many of our customers love. Whether you're a DIY enthusiast or a professional mechanic, we've got the parts you need.
If you have any questions or want to discuss your specific needs, feel free to reach out. We're always here to help you find the perfect clutch master cylinder for your motorcycle. Let's keep those bikes running smoothly!
References
- Motorcycle Owner's Manual
- Personal Experience as a Motorcycle Clutch Master Cylinder Supplier


