As a trusted supplier of Motorcycle Clutch Master Cylinders, I understand the importance of ensuring the proper functioning of these critical components. One common issue that motorcycle owners may encounter is internal leaks in the clutch master cylinder. In this blog post, I will share some practical methods on how to check for internal leaks in a motorcycle clutch master cylinder.
Understanding the Clutch Master Cylinder
Before we dive into the checking process, let's briefly understand the role of the clutch master cylinder. The clutch master cylinder is a crucial part of the motorcycle's clutch system. It converts the mechanical force applied by the rider through the clutch lever into hydraulic pressure. This pressure is then transmitted through the clutch lines to the clutch slave cylinder, which in turn disengages or engages the clutch. A properly functioning clutch master cylinder is essential for smooth gear shifting and overall riding performance.
Signs of an Internal Leak
There are several signs that may indicate an internal leak in the clutch master cylinder. These signs can help you identify the problem early and take appropriate action.
- Low Fluid Level: One of the most obvious signs is a consistently low fluid level in the clutch master cylinder reservoir. If you find yourself having to add fluid frequently, it could be a sign of a leak.
- Soft or Spongy Clutch Lever: A soft or spongy feeling when pulling the clutch lever is another indication. This is because the internal leak allows air to enter the system, reducing the hydraulic pressure and making the lever feel less responsive.
- Difficulty Shifting Gears: An internal leak can also cause difficulty in shifting gears. You may experience grinding or resistance when trying to change gears, which can be dangerous while riding.
- Visible Fluid Leaks: In some cases, you may notice fluid leaking from the clutch master cylinder itself. This can be seen as a wet spot around the cylinder or along the clutch lines.
Tools and Materials Needed
Before you start checking for internal leaks, gather the following tools and materials:
- Socket Set: To remove the necessary components and access the clutch master cylinder.
- Wrenches: For loosening and tightening bolts.
- Clean Rags: To wipe away any fluid or debris.
- Brake Fluid: In case you need to top up the fluid level.
- Safety Glasses and Gloves: To protect your eyes and hands.
Step-by-Step Checking Process
Now, let's go through the step-by-step process of checking for internal leaks in a motorcycle clutch master cylinder.
Step 1: Prepare the Motorcycle
Park the motorcycle on a level surface and engage the parking brake. Make sure the engine is turned off and the key is removed. This will ensure your safety while working on the clutch system.
Step 2: Locate the Clutch Master Cylinder
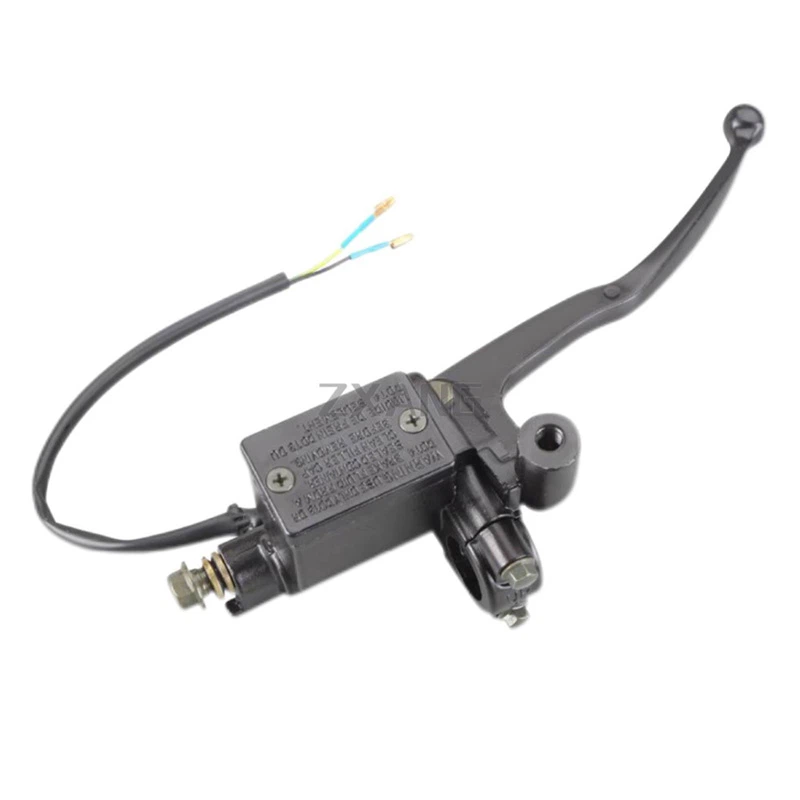
The clutch master cylinder is usually located near the clutch lever on the handlebar. It is a small, cylindrical component with a reservoir on top. Refer to your motorcycle's owner's manual if you have trouble finding it.
Step 3: Inspect the Reservoir
Check the fluid level in the reservoir. If it is below the minimum mark, add brake fluid to bring it up to the proper level. Make sure to use the type of brake fluid recommended by the motorcycle manufacturer.
Step 4: Check for External Leaks
Inspect the clutch master cylinder and the surrounding area for any signs of external leaks. Look for wet spots, drips, or stains on the cylinder, lines, or connections. If you find any external leaks, they should be repaired before proceeding with the internal leak check.
Step 5: Remove the Clutch Master Cylinder
Using the socket set and wrenches, carefully remove the bolts and connections holding the clutch master cylinder in place. Disconnect the clutch line from the cylinder and remove the cylinder from the motorcycle. Be careful not to spill any fluid during this process.
Step 6: Disassemble the Clutch Master Cylinder
Once the cylinder is removed, disassemble it according to the manufacturer's instructions. This may involve removing the reservoir cap, piston, and seals. Take note of the order in which the components are removed to ensure proper reassembly.
Step 7: Inspect the Components
Inspect the piston, seals, and cylinder bore for any signs of wear, damage, or corrosion. Look for cracks, scratches, or uneven surfaces on the piston and seals. If any of these components are damaged, they should be replaced.
Step 8: Check for Internal Leaks
To check for internal leaks, you can perform a simple pressure test. Reassemble the clutch master cylinder without the reservoir cap. Fill the cylinder with brake fluid and install a pressure gauge on the outlet port. Apply pressure to the piston using a suitable tool, such as a wooden dowel or a piston compressor. Observe the pressure gauge for any drop in pressure. If the pressure drops rapidly, it indicates an internal leak.
Step 9: Replace the Seals
If you find an internal leak, the most common cause is a worn or damaged seal. Replace the seals with new ones that are compatible with your motorcycle's clutch master cylinder. Make sure to clean the cylinder bore and all components thoroughly before installing the new seals.
Step 10: Reassemble and Install the Clutch Master Cylinder
Once the seals are replaced, reassemble the clutch master cylinder in the reverse order of disassembly. Make sure all components are properly installed and tightened. Reconnect the clutch line and install the cylinder back on the motorcycle.
Step 11: Bleed the Clutch System
After installing the clutch master cylinder, it is important to bleed the clutch system to remove any air bubbles. This will ensure proper hydraulic pressure and smooth operation of the clutch. Follow the manufacturer's instructions for bleeding the clutch system.
Step 12: Test the Clutch
Once the clutch system is bled, test the clutch to make sure it is working properly. Pull the clutch lever and shift through the gears to check for smooth operation. If you still experience any issues, repeat the checking process or consult a professional mechanic.
Conclusion
Checking for internal leaks in a motorcycle clutch master cylinder is an important maintenance task that can help ensure the safety and performance of your motorcycle. By following the steps outlined in this blog post, you can easily identify and fix any internal leaks in your clutch master cylinder. Remember to always use the proper tools and materials, and follow the manufacturer's instructions for your specific motorcycle.
If you are in need of a high-quality Motorcycle Clutch Master Cylinder or other related components, such as Motorcycle Brake Cylinder, Motorcycle Brake Lever And Master Cylinder, or Motorbike Master Cylinder, please feel free to contact us for more information and to discuss your purchasing needs. We are committed to providing our customers with the best products and services.

References
- Motorcycle Owner's Manual
- Motorcycle Repair Manuals


