


Hey there, fellow motorcycle enthusiasts! I'm stoked to share some insights on bleeding the best motorcycle master cylinder. As a supplier of top - notch motorcycle master cylinders, I've seen it all when it comes to getting these crucial components in tip - top shape.
First off, let's talk about why bleeding the master cylinder is so important. You see, air in the brake or clutch system can really mess things up. Air is compressible, while brake fluid isn't. When you have air bubbles in the master cylinder and the brake lines, it means that when you squeeze the brake lever or clutch lever, instead of all that force going towards stopping the bike or engaging the clutch, some of it goes into compressing those air bubbles. This leads to a spongy feel in the lever and reduced performance. In the worst - case scenario, it can even be dangerous, as you might not be able to stop your bike as quickly as you need to.
Now, I'm going to walk you through the steps to bleed the master cylinder like a pro. We'll use our Motorcycle Master Pump ZX - 1031 as an example, but the general process is similar for most motorcycle master cylinders.

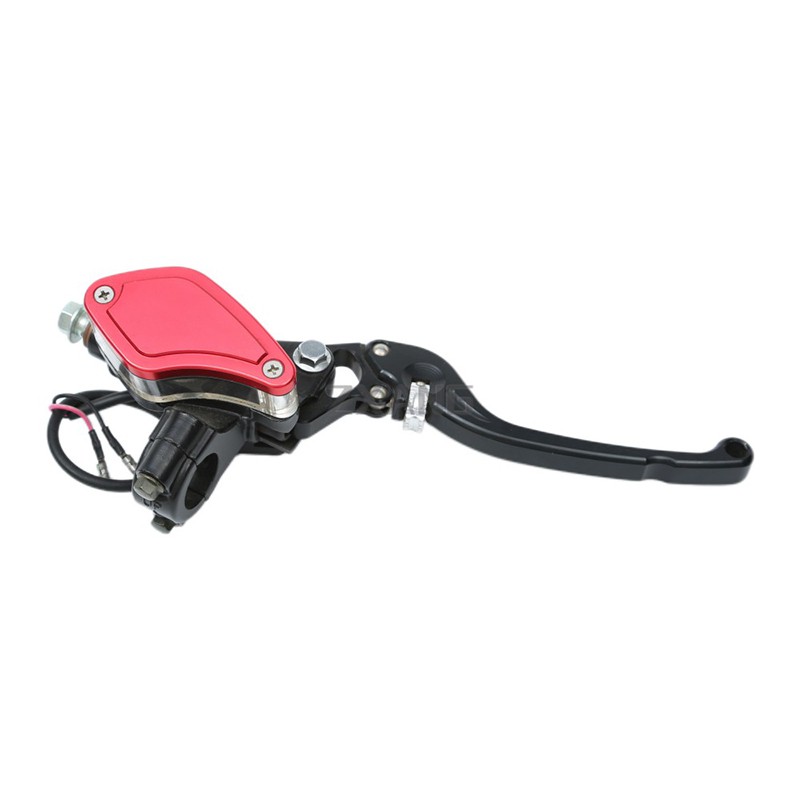
Step 1: Gather Your Tools
Before you start, you'll need a few tools. You'll need a wrench that fits the bleeder screw on the caliper (usually a small one, like a 8mm or 10mm), a clear plastic tube that fits snugly over the bleeder screw, a container to catch the old brake fluid, and fresh brake fluid that's recommended for your motorcycle. Oh, and don't forget some rags to clean up any spills.
Step 2: Prepare the Master Cylinder
Make sure the master cylinder is filled with fresh brake fluid up to the recommended level. You don't want to start bleeding with low fluid levels, as it'll just suck in more air. Also, take a look at the fluid. If it's dirty or discolored, it's a good idea to completely flush the system and replace the fluid.
Step 3: Locate the Bleeder Screw
The bleeder screw is usually located on the caliper. It's a small screw with a rubber cap on it. Remove the rubber cap and attach the clear plastic tube to the bleeder screw. Put the other end of the tube into the container for the old fluid.
Step 4: Start Bleeding
Now, it's time to get to work. Have a friend help you out if possible. One person will squeeze the brake or clutch lever while the other opens and closes the bleeder screw. If you're doing it alone, you can use a zip - tie or a piece of string to hold the lever in the squeezed position.
Slowly squeeze the lever. You'll feel it get a bit spongy at first. Then, open the bleeder screw a little bit. You should see some old fluid and air bubbles come out through the tube and into the container. Close the bleeder screw before you release the lever. Repeat this process several times until you don't see any more air bubbles in the fluid coming out.
If you're using our Master Cylinder On Motorcycle ZX - 1018, you might notice that the process is a bit smoother because of its high - quality design. It's built to make bleeding easier and more efficient.
Step 5: Check the Fluid Level
As you're bleeding the system, keep an eye on the fluid level in the master cylinder. Top it up with fresh fluid as needed. You don't want to let the fluid level get too low, or you'll suck in more air.
Step 6: Final Checks
Once you're satisfied that there are no more air bubbles in the system, give the lever a few more squeezes. It should feel firm and responsive. Check for any leaks around the bleeder screw or the master cylinder. If everything looks good, put the rubber cap back on the bleeder screw and clean up any spills.
Now, let's talk about some common mistakes to avoid when bleeding the master cylinder. One of the biggest mistakes is not keeping the master cylinder filled with fluid. As I mentioned earlier, if the fluid level gets too low, air will get sucked into the system, and you'll have to start all over again. Another mistake is not opening and closing the bleeder screw at the right time. If you open it too early or too late, you might not get all the air out.
We also have the Brake Cylinder Motorcycle ZX - 1012, which is another great option for your motorcycle. It's designed to provide reliable braking performance and is easy to bleed.
At our company, we take pride in providing the best motorcycle master cylinders on the market. Our products are made from high - quality materials and are rigorously tested to ensure they meet the highest standards. Whether you're a professional mechanic or a DIY enthusiast, our master cylinders are designed to make your life easier.
If you're in the market for a new motorcycle master cylinder or have any questions about bleeding your current one, we'd love to hear from you. We're always happy to help you find the right product for your needs. Just reach out to us, and we'll start a great conversation about your motorcycle's braking and clutch systems.
In conclusion, bleeding the motorcycle master cylinder is an important maintenance task that can improve the performance and safety of your bike. By following these steps and using high - quality components like our products, you can ensure that your motorcycle's braking and clutch systems are in top condition.
References
- Motorcycle Maintenance Manuals
- Industry Best Practices for Hydraulic Systems in Motorcycles


