Can I replace a motorbike brake master cylinder myself?
As a supplier of Motorbike Brake Master Cylinders, I often get asked by motorcycle enthusiasts if they can replace a brake master cylinder on their own. It's a valid question, especially considering the importance of the braking system in ensuring safety on the road. In this blog post, I'll explore the feasibility of self - replacing a motorbike brake master cylinder, the steps involved, and some crucial considerations.
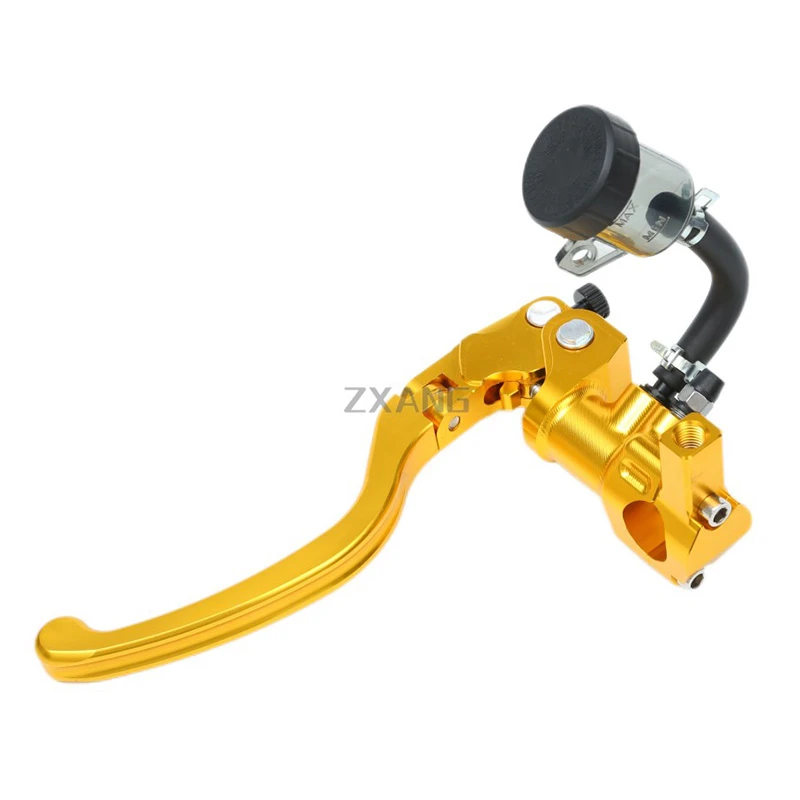
Understanding the Motorbike Brake Master Cylinder
Before we delve into the replacement process, it's essential to understand what a brake master cylinder does. The brake master cylinder is a key component of the motorcycle's hydraulic braking system. When you squeeze the brake lever, the master cylinder converts the mechanical force from your hand into hydraulic pressure. This pressure is then transmitted through the brake lines to the brake calipers, which in turn clamp down on the brake discs to slow or stop the motorcycle.
Is Self - Replacement Feasible?
The short answer is yes, you can replace a motorbike brake master cylinder yourself if you have a basic understanding of motorcycle mechanics, the right tools, and some patience. However, it's not a task for complete novices. If you've never worked on a motorcycle's braking system before, it might be wise to have someone with experience guide you through the process or to take your bike to a professional mechanic.
Tools Required
To replace a motorbike brake master cylinder, you'll need the following tools:
- Socket and wrench set: To remove the bolts holding the master cylinder in place.
- Brake fluid syringe: To drain the old brake fluid from the system.
- New brake fluid: Make sure it's compatible with your motorcycle's braking system.
- Clean rags: To wipe up any spilled brake fluid.
- Allen keys: Some master cylinders may require Allen keys for disassembly.
Steps to Replace a Motorbike Brake Master Cylinder
- Prepare Your Workspace
- Park your motorcycle on a level surface and engage the parking brake. Make sure the engine is off and the bike is cool to the touch.
- Gather all the tools and the new brake master cylinder. You can find a wide range of master cylinders on our website, such as the Universal Front Brake Master Cylinder for Motorcycle and the Motorbike Front Brake Master Cylinder.
- Drain the Brake Fluid
- Locate the brake fluid reservoir on the master cylinder. Use a brake fluid syringe to carefully remove as much of the old brake fluid as possible. Be careful not to spill the brake fluid on your motorcycle's paint or plastic parts, as it can cause damage.
- Place a clean rag under the master cylinder to catch any drips.
- Remove the Old Master Cylinder
- Use the socket and wrench set to remove the bolts that hold the master cylinder in place. There are usually two or three bolts.
- Disconnect the brake line from the master cylinder. You may need to use a wrench to loosen the fitting. Be prepared for some brake fluid to leak out when you disconnect the line.
- Once the bolts and the brake line are removed, carefully lift the old master cylinder off the motorcycle.
- Install the New Master Cylinder
- Take the new master cylinder and position it in place. Align the holes in the master cylinder with the mounting points on the motorcycle.
- Insert the bolts and tighten them securely, but be careful not to over - tighten.
- Reconnect the brake line to the new master cylinder. Make sure the fitting is tightened properly to prevent leaks.
- Bleed the Brake System
- Bleeding the brake system is crucial to remove any air bubbles that may have entered the system during the replacement process. Air in the brake lines can cause a spongy brake lever and reduced braking performance.
- Start by filling the brake fluid reservoir with new brake fluid.
- Locate the brake bleeder valve on the brake caliper. Attach a clear plastic tube to the bleeder valve and place the other end of the tube in a container filled with brake fluid.
- Have an assistant squeeze the brake lever slowly and hold it. Then, open the bleeder valve slightly to allow the air and old brake fluid to escape. Close the valve before your assistant releases the brake lever.
- Repeat this process until no more air bubbles are visible in the tube. Make sure to keep the brake fluid reservoir filled during the bleeding process.
Considerations
- Brake Fluid Compatibility
- Different motorcycles require different types of brake fluid. Using the wrong type of brake fluid can damage the braking system. Always refer to your motorcycle's owner's manual to determine the correct brake fluid to use.
- Safety First
- Brake fluid is toxic and can cause skin and eye irritation. Wear gloves and safety glasses when working with brake fluid.
- If you're unsure about any step in the replacement process, don't hesitate to seek professional help. A faulty braking system can put your life at risk.
- Quality of the New Master Cylinder
- It's important to choose a high - quality brake master cylinder. We offer a Motorcycle Left Hand Brake Master Cylinder that is made from durable materials and designed to meet the highest standards of performance and safety.
Conclusion
Replacing a motorbike brake master cylinder yourself is a challenging but achievable task. If you follow the steps outlined above and take the necessary precautions, you can save money on labor costs and gain valuable experience working on your motorcycle. However, always prioritize safety and don't hesitate to consult a professional if you encounter any difficulties.

If you're in the market for a new brake master cylinder or have any questions about our products, we'd love to hear from you. Contact us to start a purchase negotiation and find the perfect brake master cylinder for your motorcycle.
References
- Motorcycle Owner's Manuals
- Motorcycle Mechanics Guides


